How to use the Aga - your quick guide to easy cooking!
Beginners guide to Aga cooking
Quick Links - Get to the content you want!
For those of you not actually staying at Swale View (you are missing out!) scroll to the diagram which shows which oven does what and which is the boiling plate and which is the simmering plate. That will be enough to get you started. And for Christmas Recipes and carving a turkey click on the link.
While the general information and advice we provide is for our 3 oven Aga the basic principles apply to all Aga’s, two three or four oven.
And for those who are staying at Swale View and have cooked on an Aga before then you know what to do. All we ask is you give the Aga a quick wipe down with a damp cloth or sponge on any spillages. Sooner the better. Do not use any cleaning products. We will sort out the rest. It’s just had a big professional clean (November 2021) so should be good to go for a few months!
So for those who are new to Aga cooking here are some idiot proof operational instructions, I should know, I was that idiot.
And if you have any questions email them to me at hello@swaleview.com and if we can answer we will! Or try and find out for you!
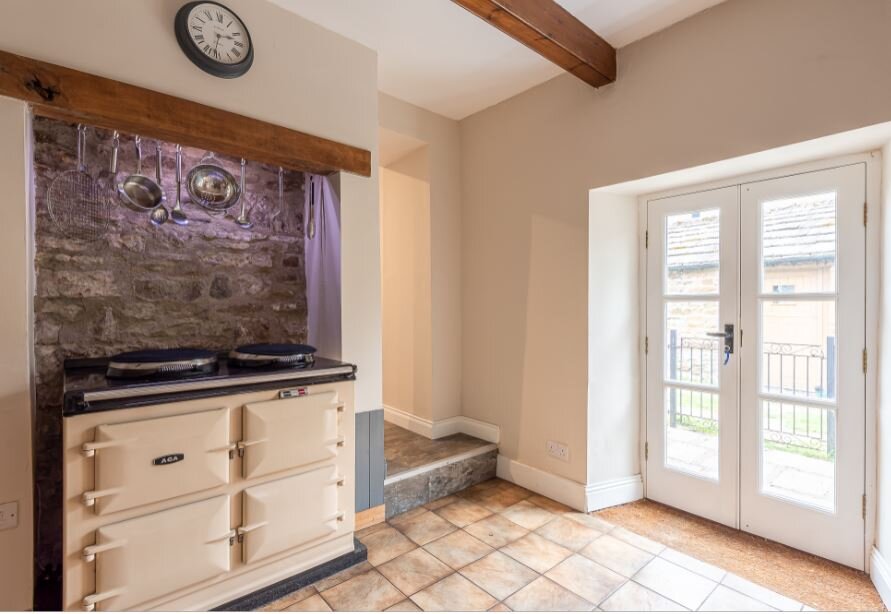
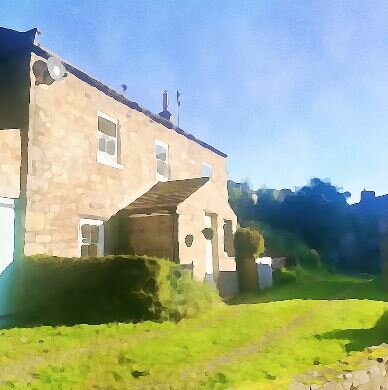
Aga at Swale View
Our traditional 3 oven Aga.
We have plenty of cookbooks in the house to help guide you on how to use the Aga with lots of recipes and helpful hints.
And plenty of cookware to enable you to cook up a storm!
Heating Up
The Aga is programmed to come on and be ready to use for cooking in the morning and throughout the day into the evening. However, if you are up super early, like us it will be in slumber mode, so not quite 100% but you can still use well enough, it just takes a bit longer.
Boost
Our Aga is controlled (by AIMS, it’s an AGA thing) which means it may not be at full operating temperature should you be using it outside of normal cooking hours, 7.30am to 8pm. If so then to get up to cooking temperature (this may take a short time or an hour or so, check the mobile thermometer in one of the ovens to ensure you are at the desired temperature) use the AIMS handset, press any button to activate the display and then press the boost button which looks like a thermometer.
Which Oven Does What?
The diagram below outlines broadly what each plate and oven does.

Image courtesy of http://www.agaliving.com
Boiling Plate - use for toast (use the Aga toast rack, top tip: heat the toast rack up for 30 seconds before you put the bread in, stops it sticking), boiling, frying and anything needing a lot of quick heat - top tip: move the pan to be half on/half off to reduce the heat on both plates
Once boiling pop pans onto the simmering plate, same for casseroles done on the oven top and ideal for making sauces, grilled veggies, drop scones
Roasting oven for roasts and grilling - it’s hot so I find about 10 minutes less for a regular roast than a fan oven at 180 degrees - approximately 210 degrees - cook on top shelf for higher heats
Baking Oven - for bread, casseroles, stews, cakes, shepherds pie (I move to roast oven to finish off) etc - approximately 150 degrees
Simmering Oven - for plates , keeping food warm, meringues and really slooooow, long cooking of tougher meats - approximately 100 degrees


These books are really useful and have lots of advice on cooking and getting the most out of your Aga. Click on the image to view details and order.
Top Tips For Aga Cooking
The ovens use radiant heat so to grill or brown your cheese, potatoes or toppings use the top level rack in the roasting oven. Conversely if you want to cook something at a high heat but don’t want it to brown too quickly then lower the shelf level or even place a baking tray above the food you are cooking.
PRO TIP: To stop your hot plates losing heat use a kettle to boil water before using with saucepans on the plates
Once a pan is boiling on the boiling plate move to the simmer plate to keep on a rolling boil.
Move the pans position on the hot plates to maintain the heat level required. We often have pans sitting half on the plates and half on the enamel as this creates room for more pans and you will still be able to keep the heat in the pans and plates.
One of the good things is you can cook different food types in the same oven as they do not cross contaminate each others flavours.
Try to minimise the use of the plates and move dishes to the ovens asap. This is much more efficient and easier to regulate.
We also use Blake & Bull hob covers to keep the Aga boiling and simmering plates warm when not in use.
You don’t need to touch the control panel, it’s all set to go!
And close the doors and plate lids as soon as you can as these will lose heat from the rest of the oven if left open.
Here are some easy Aga Recipes as well for you to try out while up at Swale View including veg and sausage bake, a no fuss frittata, my favourite dauphinoise potato’s, pancakes and a classic Victoria sponge.
We also have many cookbooks for you to use including the very latest from Mary Berry and Lucy Young ‘The complete Aga cookbook’ which has over 150 recipes for all meals and snacks and how to use the Aga to cook them!
How to us the Aga Toasting Rack
Ok, this was my first introduction to using an Aga round at a mates fancy country cottage. And I loved the toast it made so was a big incentive to me for having an Aga.
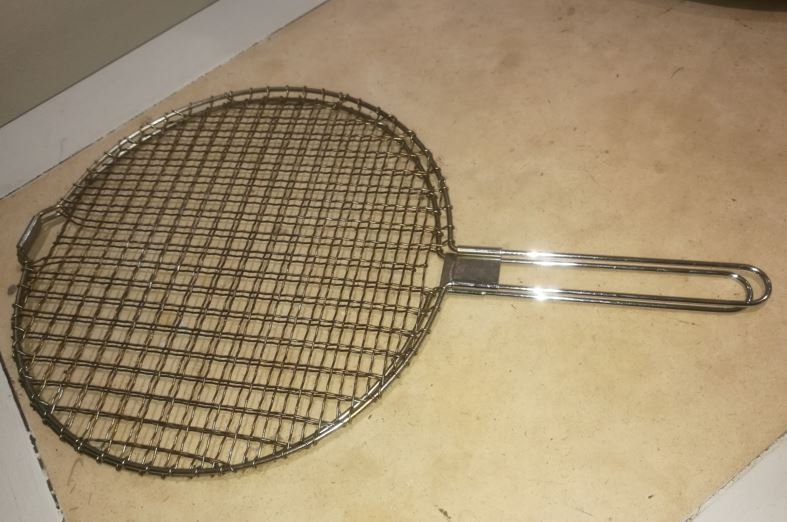
This is our Aga toasting rack which I can assure you in the right hands makes delightful toast!
It’s pretty simple really really with one key element.
Heat the toast rack up first! About 30 seconds should do it on the left hand side boiling plate, the hottest one.
Then open it up so you can sandwich your toast in between the two racks,
Close the rack and toast on one side to your desired colour, check and flip over to toast the other side.
Be careful though, it’s quick to colour the toast!
And that is it really. What you will end up with is perfectly cooked and patterned (the rack produces a fine criss cross effect , I’ll add a photo soon) toast.
You can usually get two big sized pieces of bread in the rack at one time.
Happy toasting!
And if you are looking to buy a new toasting rack click on the link for the official Aga Essential Toaster
Five and Four Door Aga Layouts
For those who are using different sized Aga’s please see below for how the four and five door Aga’s are configured.
The main difference between the 3 and the 4 and 5 door versions is the addition of the warming plate and also the warming oven with the 5 door Aga alos having a slow cooking oven. One day maybe I will have the space for one of these!

Aga 5 Oven door layout - image courtesy of tncook.co.uk

Aga 4 Oven door layout - image courtesy of tncook.co.uk
What are the Aga Christmas turkey cooking times?
To be honest I don’t know as I have never cooked a turkey in the Aga (more of a lamb, goose, chicken, game person, love cold turkey, of the sandwich; not the other kind!) however here are some quick links to find out some options. Good luck and if nothing else invest in a meat thermometer to ensure your turkey is cooked to perfection!
We have more information on How long to cook a Christmas Turkey in an Aga here.
And more info below if you need it.
Blake and Bulls turkey timings are here.
Aga Living cooked turkey times here.
Aga Cookshop (pdf) here.
Mary Berry turkey times at the bottom of the recipe here:
The Ordinary Cook turkey timings are here.
Ok, you pays your money and makes your choice. Good luck with your Aga cooked turkey and I hope it is cooked well and is as succulent as can be!
I’m had beef this year as I rarely have roast beef so there you go. PS The longer the resting time the better it will be, usually at least 60 minutes.
For those who are interested check out our post on insulating an Aga and whether it is possible to save money and cut costs - click on the link!
Easter recipe and tips
A quick note on Easter roasting tips for those needing to know how to roast a leg or shoulder of lamb
Large roasting tray
A bit of oil and season with salt and pepper
Add rosemary and garlic as required (chop garlic into smallish slithers, stab lamb with a sharp knife and push garlic into the hole, all the way in otherwise it burns)
Cover with foil - optional, see how well it is cooking
Place in the top/roasting oven for 30 mins to 1 hr
Remove to place in simmering/medium oven for 3 to 4 hours
Remove foil with 30 minutes to go
Remove from oven and rest for 20 minutes
Eat!
*We use Amazon affiliate links on some product suggestions to help us run this site. There are no additional charges to you as a customer. for more information see our Affiliate Disclaimer.